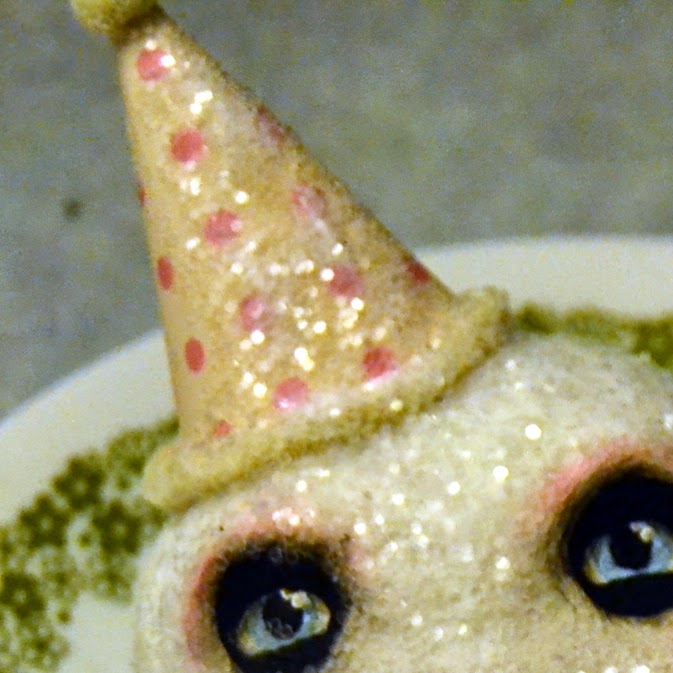
I have made a few Skeletons using Creative Paperclay®, but never (I'm not sure WHY...?) any SNOWMEN... so I got started the other day, with a vague snowman/snowball idea in my head. As I worked, I changed directions a little bit, and ended up creating a Skull snowball. I may be a bit partial, but I really REALLY like how she turned out!
WHAT YOU'LL NEED to make your own Snowball Skeleton:
- Scrap Paper and Tape (I used some old homework from the boys, and some Washi that isn't my favorite)
- Creative Paperclay®
- Paints and Brushes I use Folk Art acrylic craft paints and Krylon Spray paints
- Pastels
- A 3X3 inch (or so) piece of patterned paper.
- Yarn or metal pipe cleaners
- Glue. I used E600 and Crafter's Pick the Ultimate
- Glitter. I used an old jar of clear glitter I purchased at the thrift store, but you can get it at any crafting or school supply store.
- Fake Holly or other collar decorations
To start, I create a core for my snowball. Using a core helps me use less clay, and also speeds up dry time, because innards don't need to dry! To create my core, I used a couple pages of old homework from my boys, and rolled them up into a ball. Then, to keep the shape, I wrapped the papers up in some of my less favorite Washi tape. Not because it needs to be Washi, but because that's what was close, and I was lazy. Any tape will do. Masking is nice too, because it's easy to shape as you tape.
Once I had a good basic shape, I pressed Creative Paperclay® over the top, and created a more uniform roundness to the snowball.
When my shape was satisfactory, and while my clay was still wet, I layered on some more clay and shaped it into a face. You can add fresh clay to dry also. In both cases, you should use a bit of water on your finger tips and wiped onto the location you're adding new clay. This helps the two surfaces join well. Some rolled clay for the eyebrow bone, a rolled piece for the nose, and balls at the cheek and chin. Blend all the edges, and shape. I used my fingers for the whole process.
I also added a small round of clay at the bottom of the ball, to help the piece sit in one direction when it's resting on a counter or shelf.
I popped my piece into the oven at a VERY low temp (190 degrees) to speed up my drying time. Then I painted it with white gesso, and added the face of my piece. When I was working on the mouth, I originally tried to make an actual skeleton mouth, but I realized the piece would look more like a snowman if I used "coal" dots instead, so that's what I ended up with. For the eyes, the skeleton look is achieved by painting the black for the hollow eye sockets, and then painting eyes in over that. Notice that the nose is also similar to a skelton's. I think that is key to letting people know this isn't your ordinary snowman. Last, use your pastels to add a rosy glow to your skeleton's cheeks, brow bones, "nose" and chin.
Blend the eye socket area where the white meets the black with some shading. You can use your pastels for this area too.
Now you're ready for your GLITTER!! I used Crafter's Pick, the Ultimate for this part. I kept the glue thin at the front of the face, and made it thicker around the sides and forehead. I didn't put any glue on the eye area.
Sprinkle your glitter on, and while it's drying, get to work on your HAT! To make my hat, I used a large glass to draw a circle, and cut it out of my patterned paper. Then I folded it in 1/2, and rolled it into a cone. I cut a little of the excess off, and taped the inside seam of my cone to hold the shape. Then I glued the outside seam. I tied some yarn, cut the tip of the cone to create a hole the strings would fit through, and pulled the "pom" into the top of the hat. Then I glued the same yarn around the "bottom" of the hat, on the outside of the paper. Once that was dry enough, I glued the whole thing down onto my snowball snowman's head. I also added some glue and glitter to the top to make the hat look a little frosty! All of this gluing was done using Crafter's Pick.
To create the "collar" on my snowball, I used some vintage Holly leaves and berries that I had saved from a thrift store find I have had stashed for years. For this part, I used my E6000 glue, because I wanted to make sure the plastic holly leaves and berries stayed in place well.
Once that glue was also dry, I painted just a bit more glue (Crafter's Pick) onto the leaves and berries, and frosted them with some glitter!
Here she is again! I feel like she needs a name... IDEAS!?


No comments:
Post a Comment